So you’ve received the heirloom wedding dress from your mother and have thought about wearing it. But wait.. it doesn’t fit! Or perhaps the style is just a bit out-of-date for your liking? Don’t completely turn down the dress yet – you might still be able to wear it, and make it your own!
Many brides these days are turning to vintage wedding dresses from their mother or grandmother. It’s become a big trend over the last few years, and only continues to increase! Think about it – wearing a special gown that embodies the strength, wisdom, and compassion of the women in your family down the aisle on one of the biggest days of your life. But where do you even start if this is something you just *might* be thinking about?
We’ve put together 8 Simple Steps to Redesigning Your Mother’s Vintage Dress to give you a better idea of what the process looks like! The entire process can vary in the time it will take to fully complete your dress, and really depends on the number of changes you are wanting to make, but it’s a good idea to start around 9-12 months out.
1. Is There a Possibility?
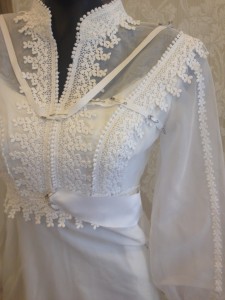
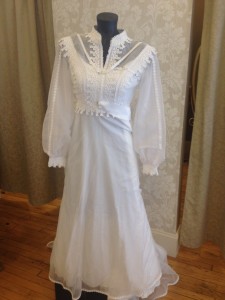
The first step is to bring the vintage gown to us so that we can determine whether there is even a possibility for you to redesign and wear it! We’ll examine the fabric, beading, lace, examine any stains, and how it has been handled and preserved through the years (ie, was it placed in a box, or in a pile on the floor of a closet?). Depending on the gown’s age, we may need to work with our vintage restoration department to clean and restore it before working with it. Sometimes the entire gown can be worn, other times, only parts of the gown or certain fabrics are able to be used for your gown.
2. Let Our Designer Get to Know YOU!
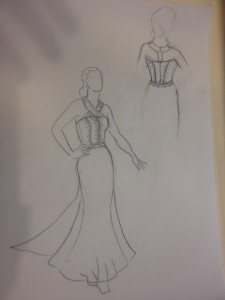
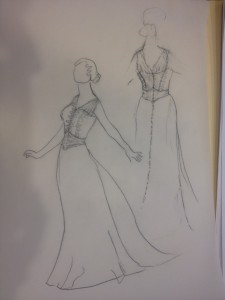
Darcy, our Wedding Gown Designer, would love to learn more about you, your likes, dislikes, things you are drawn to so that she can get a better idea of what you might like. This step usually includes sending Darcy pictures of other dresses you like – whether it’s parts of a dress (ie. the neckline, or a certain type of beading). It can also help to share a Pinterest board with Darcy and some of your overall ideas for the wedding, pictures of architecture or places, or any beautiful images that you really feel drawn to! Darcy is then able to draw a few sketches and come up with some ideas for transforming the gown into something you would love.
3. Meeting #1 – Talk Design and Take Measurements
Next, you’ll set up a second meeting with Darcy to see what she has come up with. She’ll usually have a few ideas and options for how she thinks you would love the gown to look. You can then edit the designs from there and talk more about your preferences. During this meeting, Darcy will take your measurements as well.
4. Show Actual Changes on the Vintage Dress
 Once the final design is agreed upon, Darcy will use your measurements to mark up the vintage dress to show where changes will be made. This could include safety pins, bits of fabric, or ribbon to show the changes. At this time, the dress will be altered a little to fit your earlier measurements – this could mean the dress might get cut in certain areas, but not always.
5. Meeting #2 – First Fitting
You’ll set up another meeting with Darcy to come in and see the dress as it is marked up. You will try on the dress to make sure the measurements are accurate and that everything is lined up in the correct locations. This is the moment when you can begin to really visualize and see the dress becoming YOUR dress!
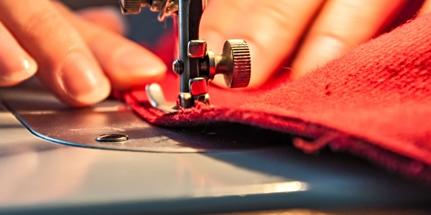
6. Sewing
This is where Darcy begins to sew your gown – to place lace or fabric in different places and to fit the dress perfectly for you. Throughout this period, she may be in contact with you for minor tweaks or other measurements. This is your dress, and you want it to be fabulous!
7. Final Fitting
At your final meeting with Darcy, you get to see the final result! You are able to try on your dress, make sure it fits, and to show it off to all your best girlfriends! If there are any minor tweaks to be made, we make sure to leave a little time to complete them.
8. It’s Wedding Time!
Once your gown is complete, we press it to perfection, and give it to you for your big day! You are going to look beautiful!